Introduction
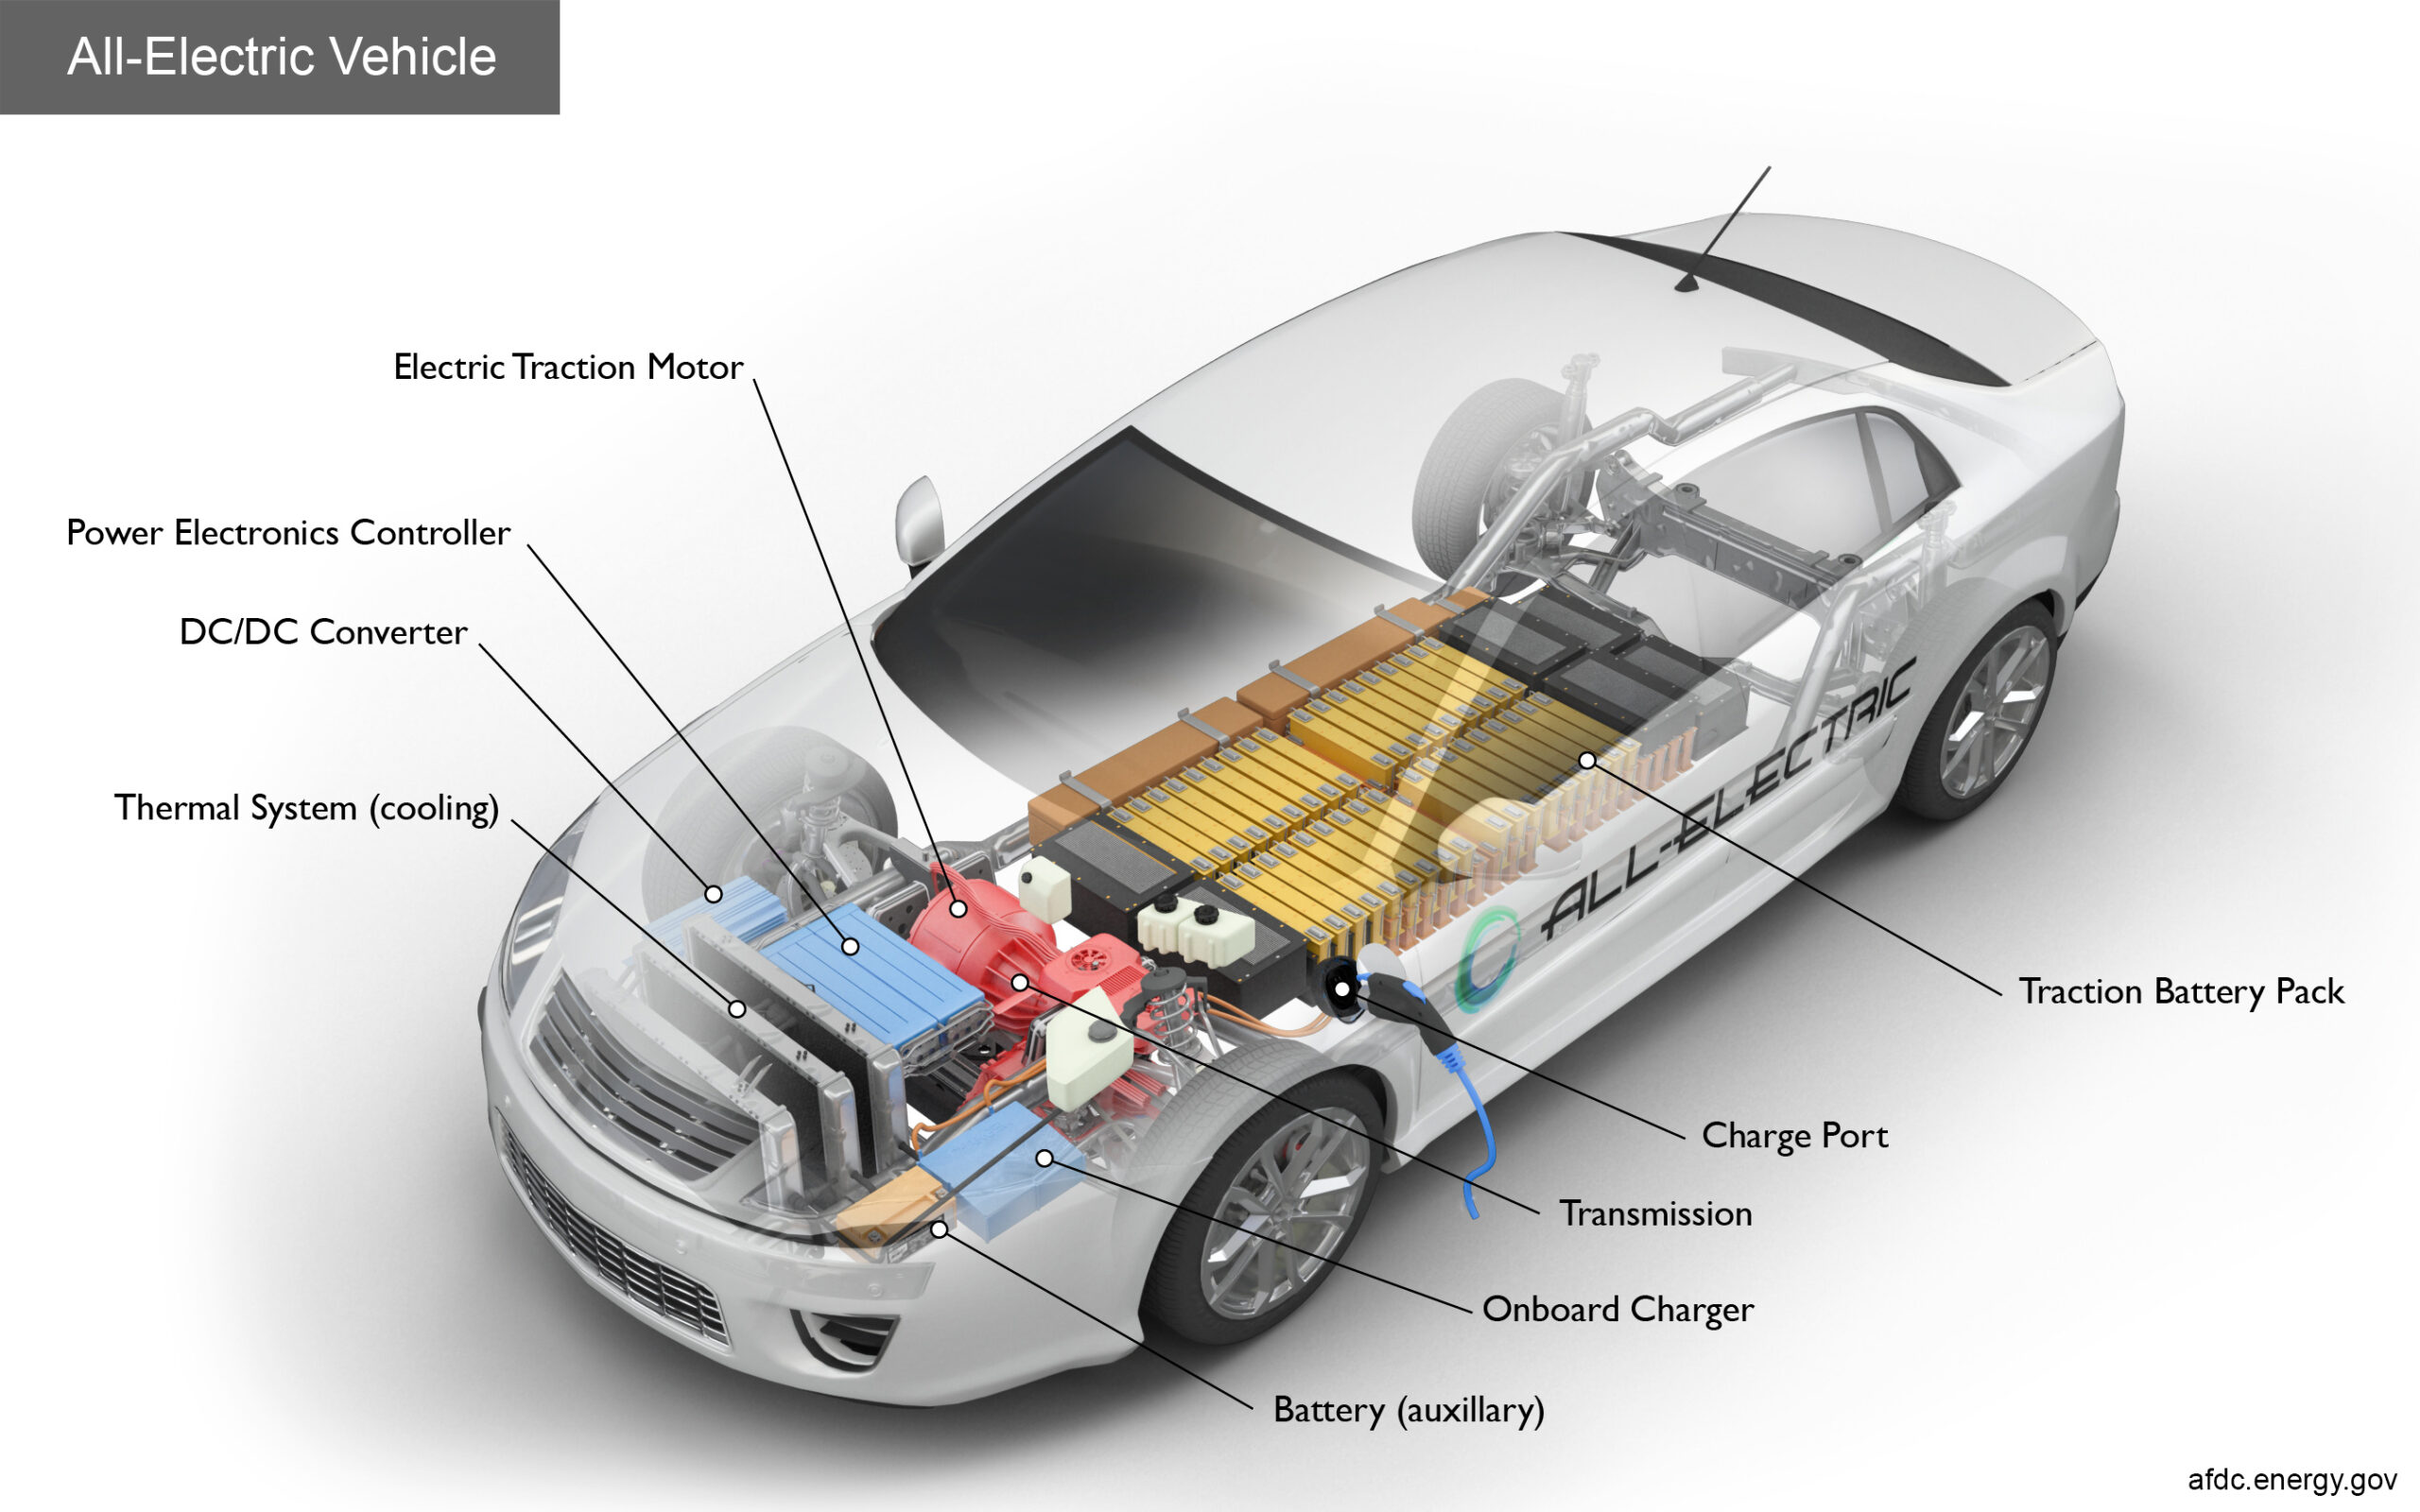
The DIY electric vehicle (EV) movement has gained significant momentum as enthusiasts and eco-conscious individuals seek to create sustainable transportation solutions. Building your own electric vehicle not only contributes to reducing carbon emissions but also allows for customization and innovation. A critical aspect of any DIY EV project is selecting the right electric motor, as it directly impacts performance, efficiency, and overall driving experience.
Understanding Electric Motors
Explanation of Different Types of Electric Motors
When embarking on your DIY EV project, it’s essential to understand the various types of electric motors available:
- DC Motors: Simple and cost-effective, DC motors are easy to control but may require additional components for speed regulation.
- AC Motors: More efficient than DC motors, AC motors provide better performance and are commonly used in modern EVs.
- Brushless Motors: These motors offer high efficiency and low maintenance due to the absence of brushes, making them a popular choice for high-performance applications.
Key Factors to Consider When Choosing an Electric Motor for Your EV
When selecting an electric motor, consider the following factors:
- Power Output: Ensure the motor provides sufficient power for your vehicle’s weight and intended use.
- Torque Characteristics: Look for a motor that delivers adequate torque at low speeds for better acceleration.
- Size and Weight: The motor’s dimensions should fit within your vehicle’s design without adding excessive weight.
Planning Your DIY EV Project
Setting Project Goals and Budget Considerations
Before diving into your project, outline clear goals. Are you aiming for a commuter vehicle, or do you want to build something for off-road adventures? Establishing a budget early will help guide your decisions on components and materials.
Assessing the Vehicle Type and Intended Use
The type of vehicle you plan to convert significantly influences your design choices. Whether it’s a compact car or a larger truck, understanding its intended use will help determine the necessary specifications for the electric motor and battery system.
Gathering Necessary Tools and Materials
List of Essential Tools for Installation
To successfully install an electric motor, gather the following tools:
- Socket set
- Wrenches
- Screwdrivers
- Drill
- Multimeter
- Wire strippers
- Soldering iron
Overview of Materials Needed for the Project
Key materials include:
- Electric motor
- Battery pack
- Motor controller
- Wiring harness
- Mounting brackets
- Connectors and fasteners
Preparing Your Vehicle for Motor Installation
Steps to Remove the Existing Internal Combustion Engine (if applicable)
If you’re converting a gasoline vehicle, start by safely removing the internal combustion engine. This typically involves:
- Disconnecting the battery.
- Draining fluids (oil, coolant).
- Removing components like the exhaust system and fuel tank.
- Detaching engine mounts and lifting out the engine.
Modifications Needed for Electric Motor Compatibility
After removing the engine, you may need to modify the vehicle’s frame or mounting points to accommodate the electric motor. Ensure that all modifications comply with safety standards.
Installing the Electric Motor
Step-by-Step Instructions for Mounting the Electric Motor
- Position the motor in place using mounting brackets.
- Align it with the existing drivetrain components (e.g., transmission).
- Securely fasten all bolts and ensure proper alignment.
Wiring and Electrical Connections: Best Practices and Safety Tips
When wiring your electric motor:
- Use appropriately rated wires to handle current loads.
- Ensure all connections are secure and insulated.
- Follow manufacturer guidelines for wiring diagrams.
- Always disconnect power before working on electrical systems.
Integrating the Battery System
Overview of Battery Types Suitable for DIY EVs
Common battery options include:
- Lead-Acid Batteries: Cost-effective but heavier with lower energy density.
- Lithium-Ion Batteries: Higher energy density, lighter weight, and longer lifespan but more expensive.
Step-by-Step Guide to Connecting the Battery to the Motor
- Position the battery securely in your vehicle.
- Connect positive terminals from the battery to the motor controller.
- Connect negative terminals to complete the circuit.
- Ensure all connections are tight and insulated.
Setting Up the Controller and Throttle System
Explanation of Motor Controllers and Their Functions
The motor controller acts as the brain of your EV, managing power delivery from the battery to the motor based on throttle input.
Instructions for Installing and Configuring the Throttle System
- Install the throttle pedal in an accessible location.
- Connect it to the controller using appropriate wiring.
- Calibrate settings according to manufacturer instructions.
Testing Your Installation
Pre-testing Checklist to Ensure Safety and Functionality
Before conducting tests, ensure that:
- All electrical connections are secure.
- No tools or loose parts are left in or around moving components.
- The vehicle is on a flat surface with sufficient space around it.
Step-by-Step Guide to Conducting Initial Tests on Your DIY EV
- Reconnect the battery.
- Power on the system and check for error codes on the controller.
- Gradually apply throttle while monitoring motor response.
- Test braking functionality to ensure safety features work correctly.
Troubleshooting Common Issues
Common Problems Encountered During Installation and How to Resolve Them
Issues such as poor acceleration or overheating can arise during installation. Common solutions include:
- Checking wiring connections for shorts or loose contacts.
- Ensuring proper alignment between motor and drivetrain components.
Tips for Optimizing Performance Post-installation
After installation, consider tuning parameters in your controller settings or upgrading components like batteries or controllers for improved performance.
Final Touches and Customization
Ideas for Personalizing Your DIY EV Project
Customization can enhance both aesthetics and functionality; consider adding features like custom paint jobs or upgraded interiors.
Recom mendations for Additional Features (e.g., Regenerative Braking, Advanced Displays)
Explore advanced technologies such as regenerative braking systems that can improve efficiency by capturing energy during deceleration or integrating digital displays that provide real-time data on speed, battery status, and range.
Conclusion
Installing an electric motor in your DIY EV project is an exciting endeavor that combines engineering skills with creativity. By following this step-by-step guide, you can successfully navigate each phase of your project—from planning through testing—ensuring a rewarding experience that contributes positively to sustainable transportation efforts. Don’t forget to share your journey with others in DIY EV communities; collaboration fosters innovation!

